
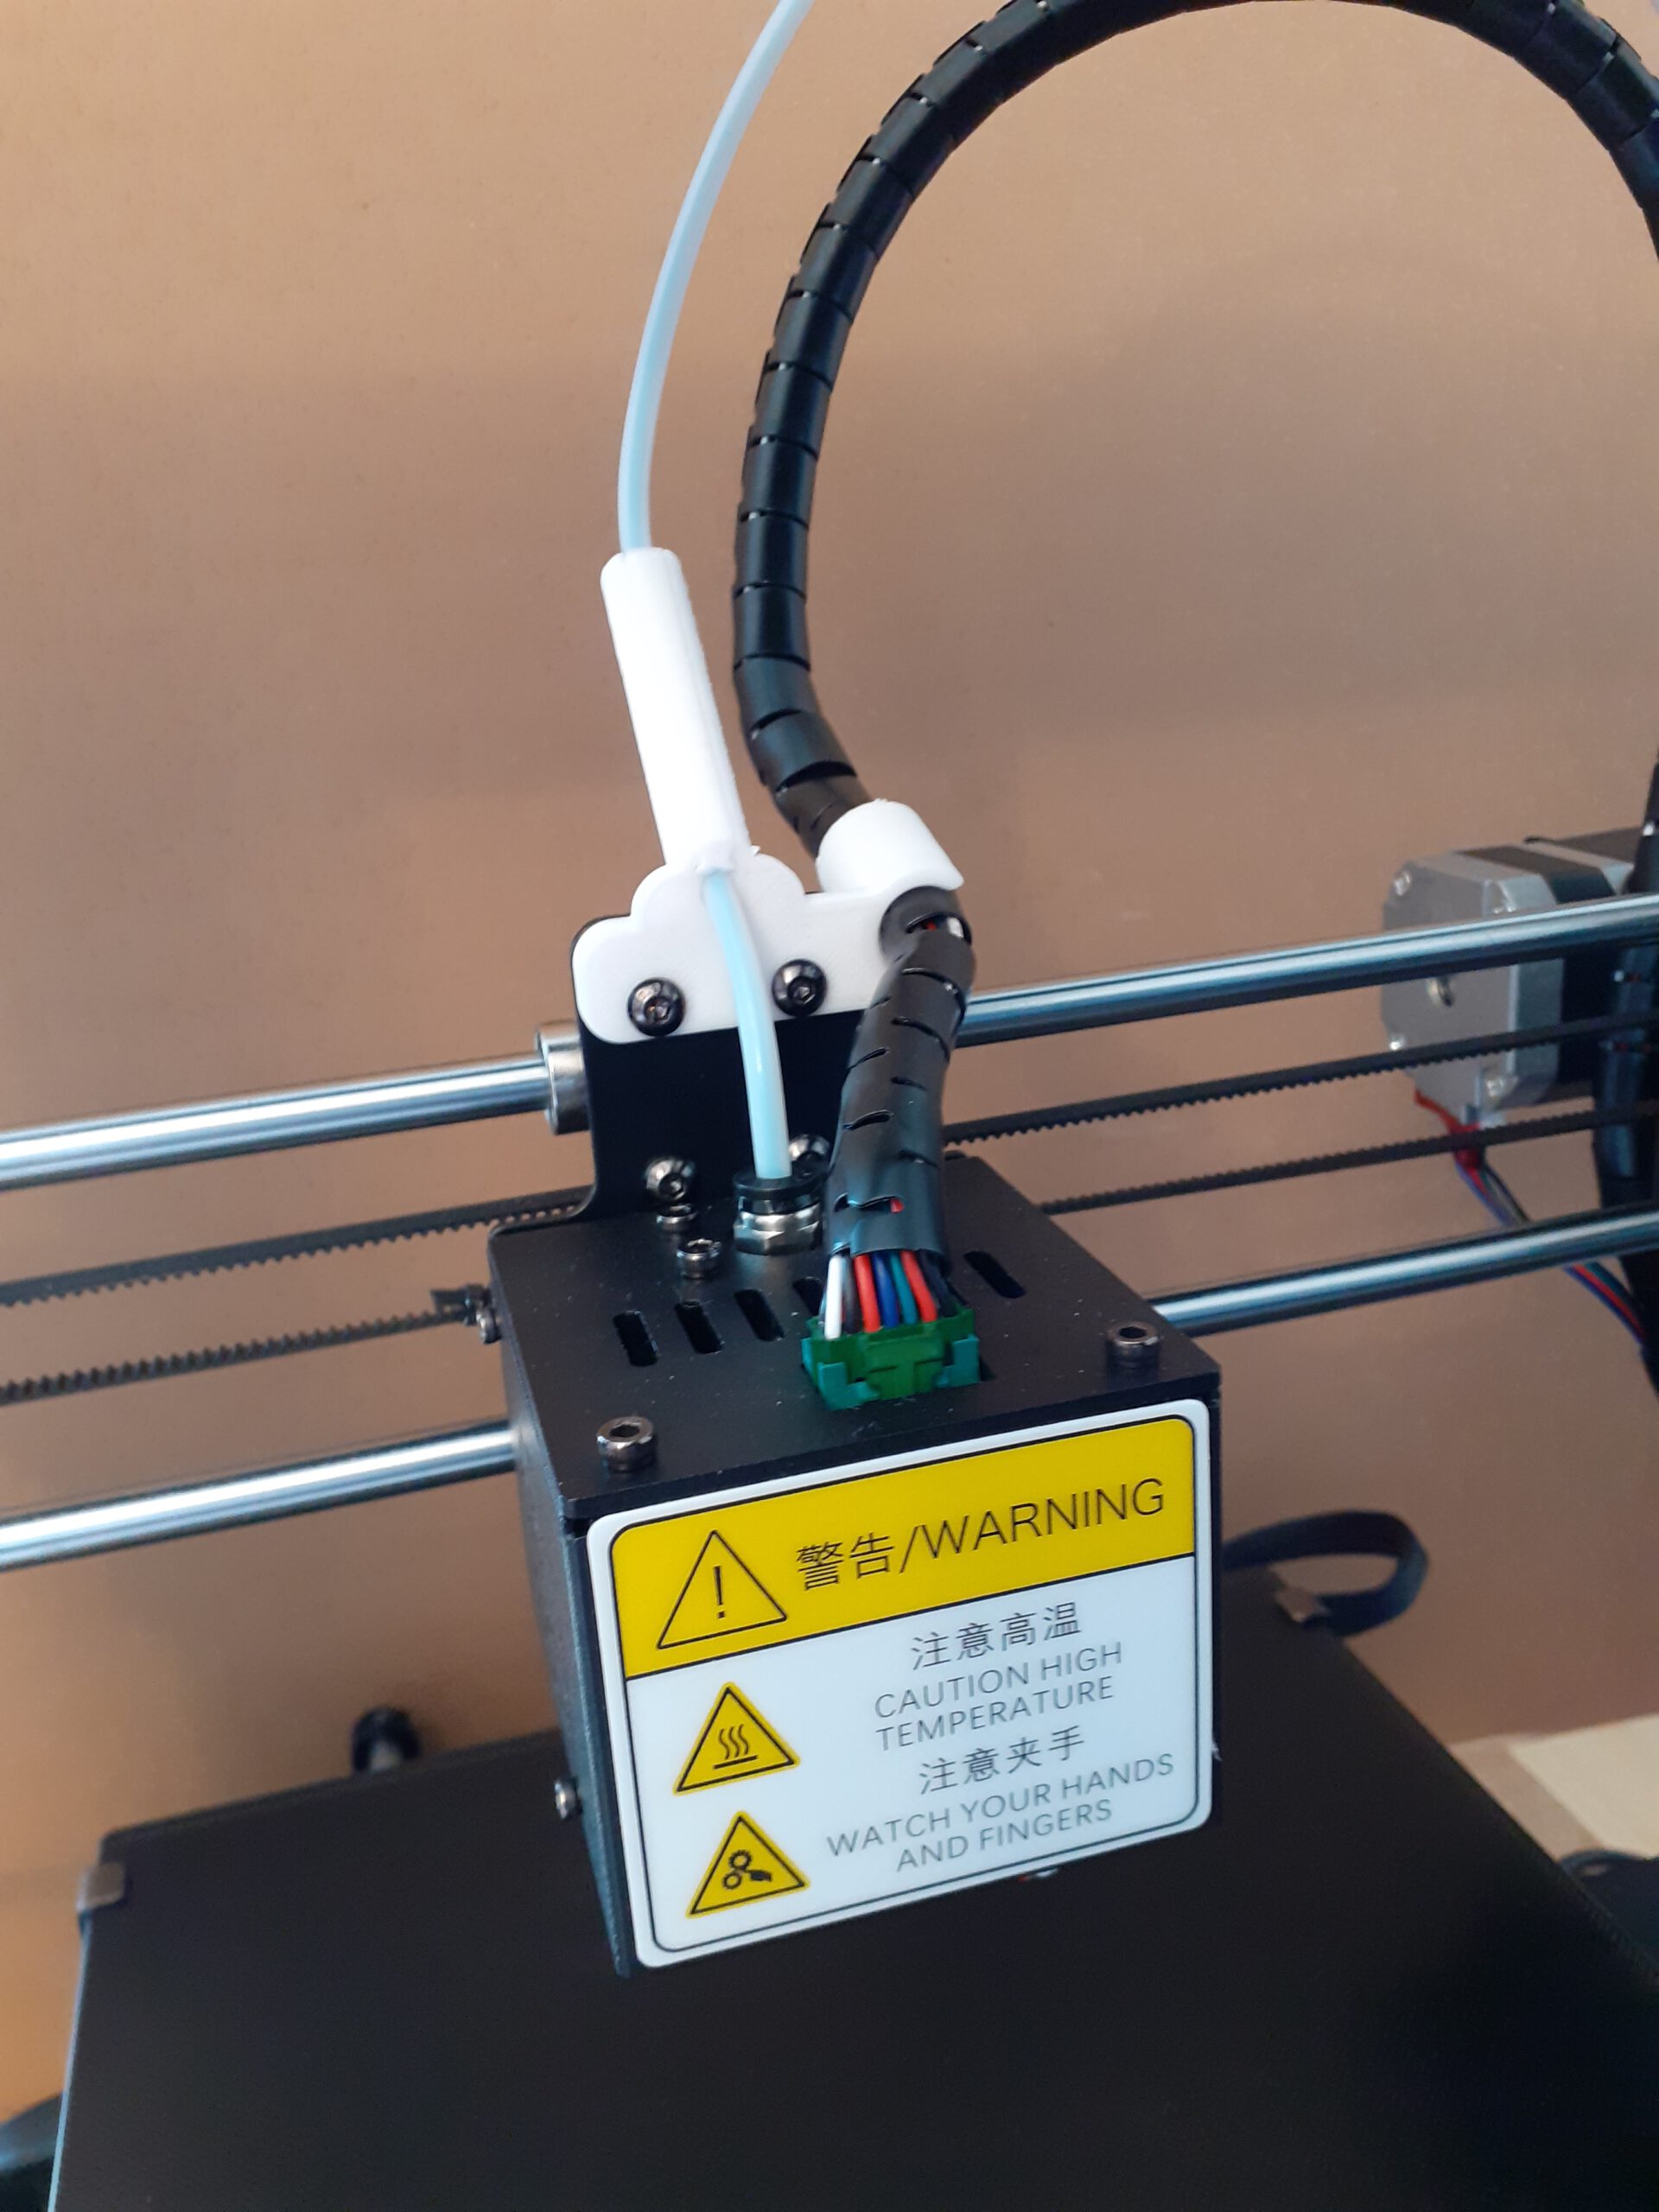
The Problem
The first modification I made to the 3D printer was small, but extremely valuable. By default, the cable conduit with the hotend cables is fastened with a zip tie to the top of vertical mounting plate of the hotend. The bowden tube is attached to the cable conduit with zip ties. In my case, the hotend cables were pulled back to strongly that the plug was not sitting straight in the socket and the connector holder was bent. Also, the bowden tube was rather sharply bent as it was interfering with the hotend cables on its way into the hotend. That just did not look right!
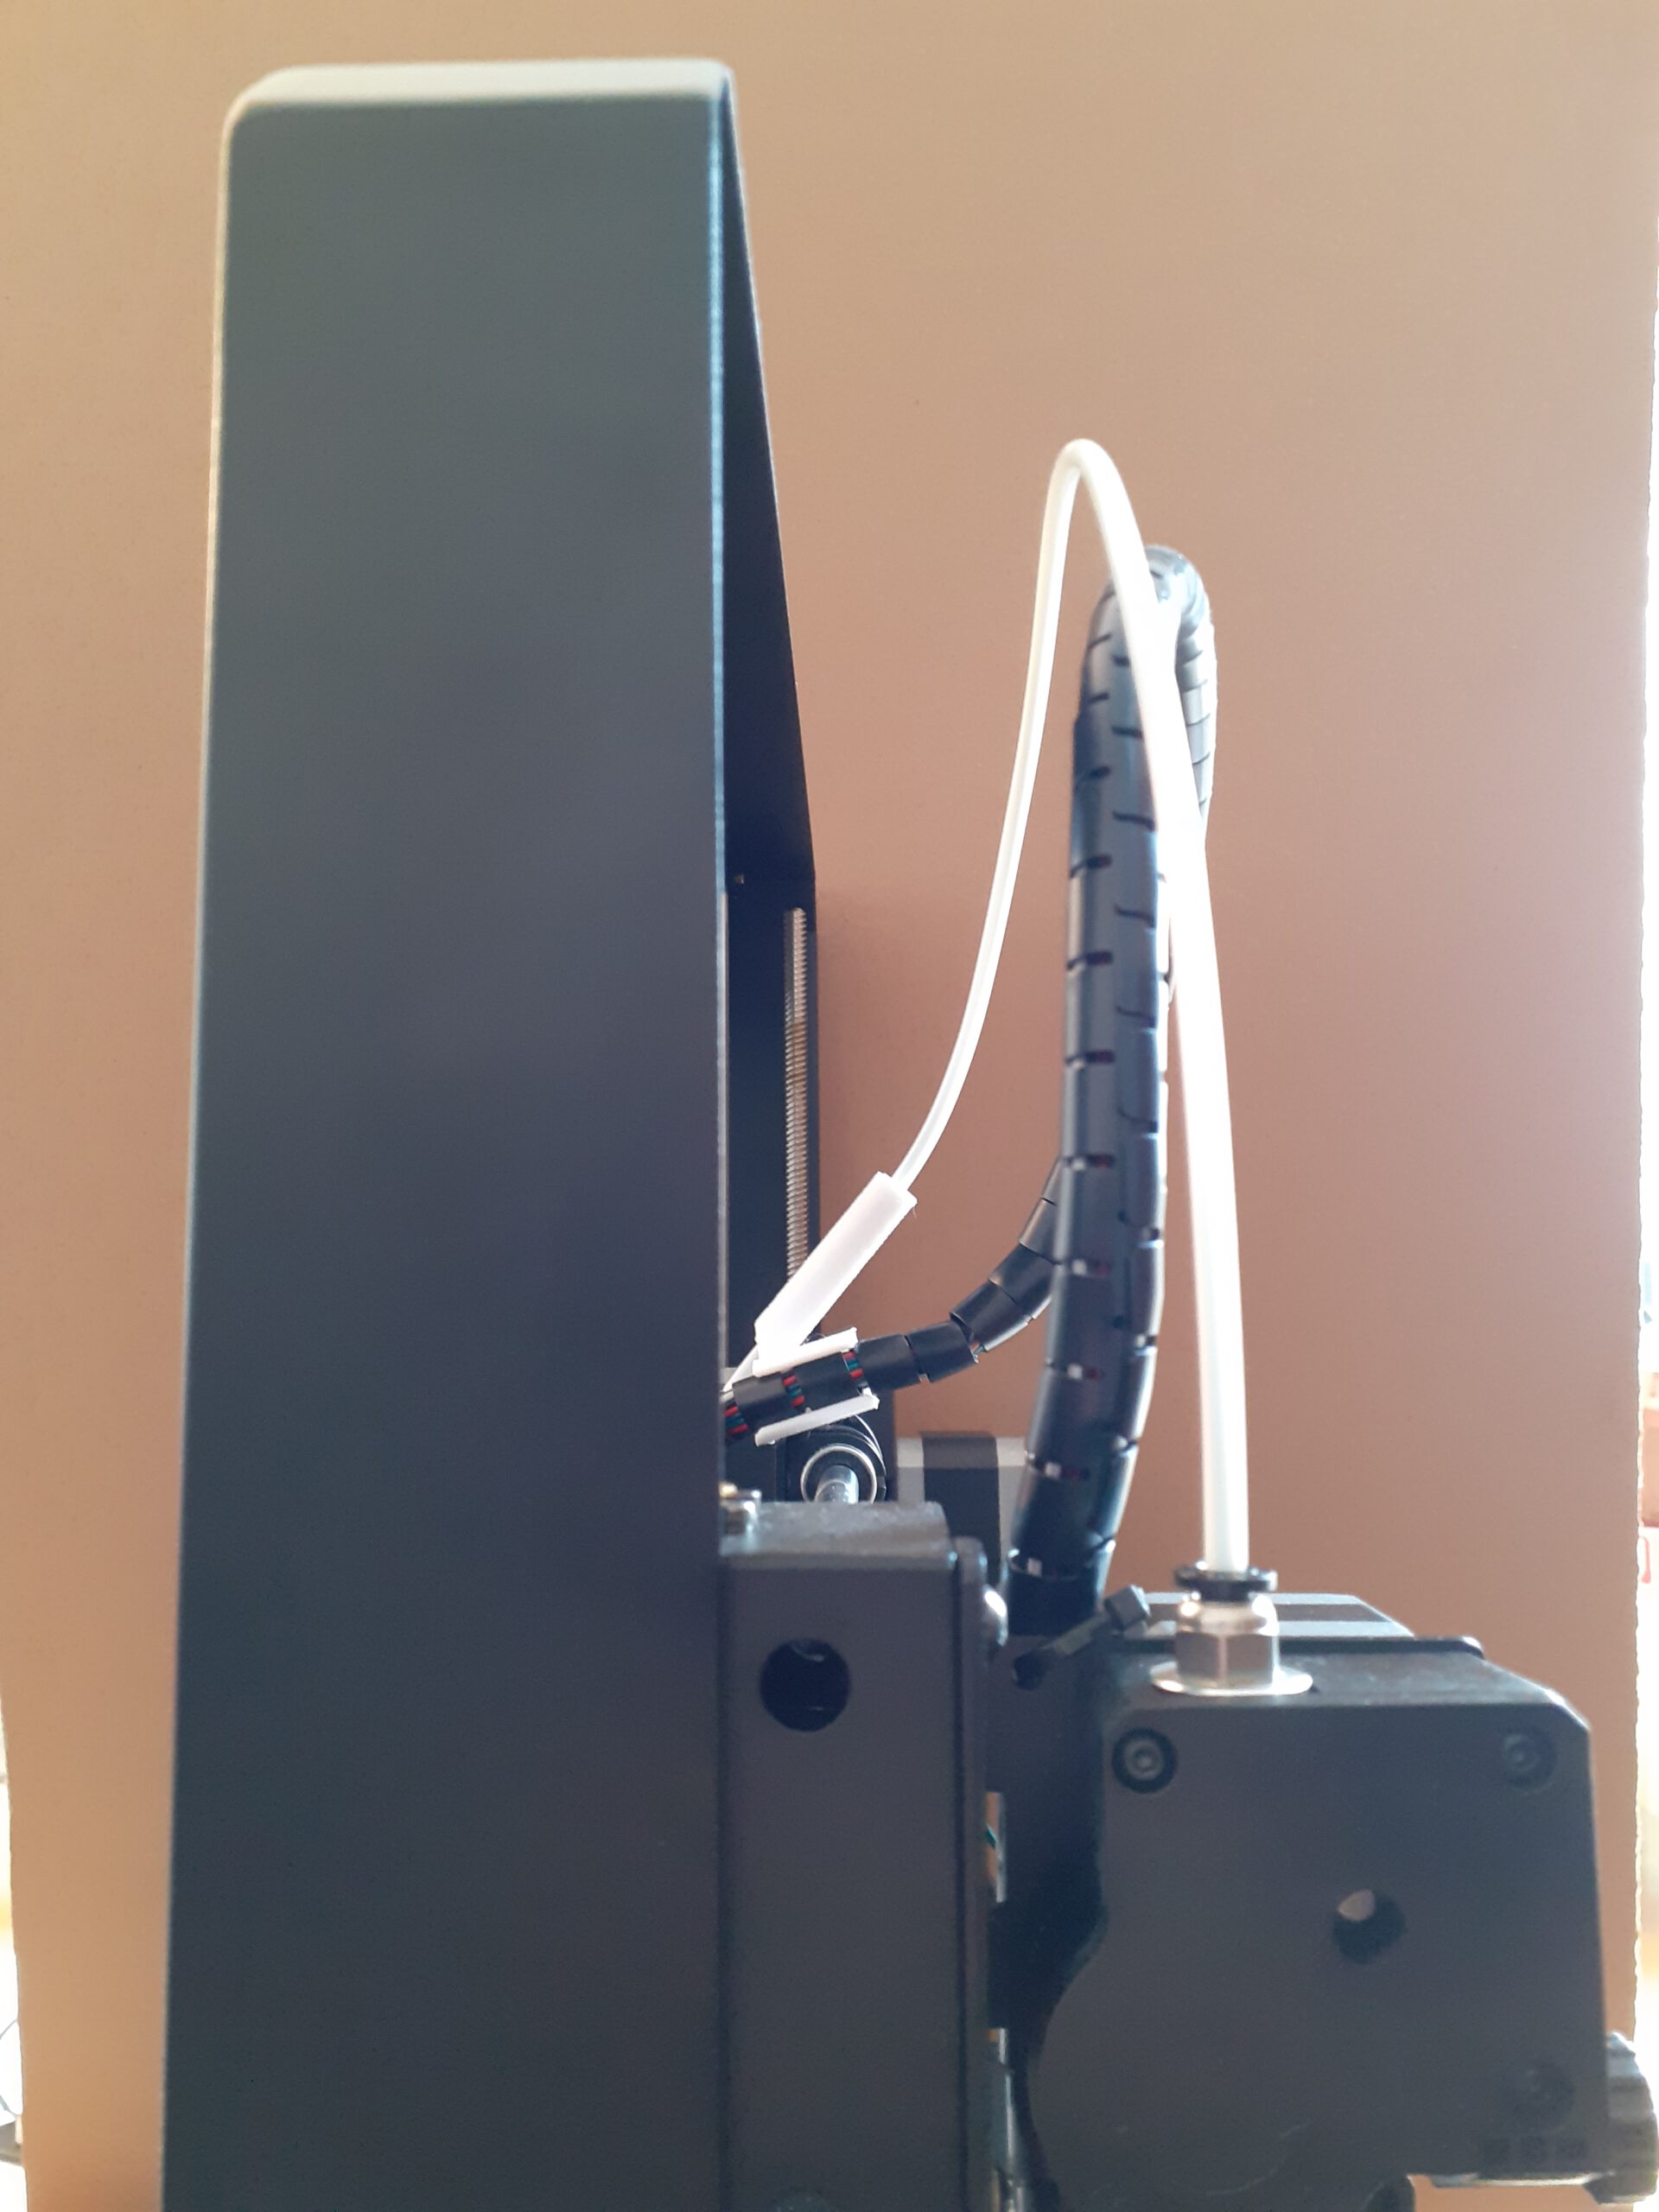
The even bigger issue was that both the bowden tube and the cables would be pushed against the upper part of the gantry as soon as the print exceeded a certain height. I had to sit and watch the printer reach that critical hide and then manually push the cables back until they stayed behind the gantry. I noticed that the bowden tube was also constantly rubbing against one of threaded rods. That did not cause any abrasion, but again, it was more about the esthetics here… Okay, it wasn’t good at all, we got that now. Enough complaints, on to the solution.
The Solution
There are several designs for cable routing online. The one I liked best is this one: https://www.thingiverse.com/thing:3036683. It keeps the cables and the bowden tube clear from each other and routes both to the back of the printer. Both are not interfering any more with the gantry.
The Print
The print worked fairly well. I had a lot of stringing problems, though, and some filing was necessary to achieve smooth surfaces. But I was also using the rest of the filament that came with the printer and this may not be the best material.
The Installation
The installation is also easy and does not require any extra parts. Remove the three zip ties that fix the cables and the bowden tube. Use an Allan key to unscrew the two top screws that fix the bearing. No worries, the bearing is still kept in place by the two bottom screws. Now use the two screws to install the new part.
The cable clips in very easily, but is firmly keept in place. The bowden tube is much harder to insert into its guiding tube. I used a pair of pliers to push the tube in and put the Allen key between the pliers and the tube to distribute the pressure more evenly and avoid damaging the tube. When it has snapped into place, the top part slides in fairly easily after removing any excess material.
The Resume
Was it worth it? Yes, definitely! It is a fairly quick print and easy to install. Not just does the printer look better, it has also improved the functionality a lot. I highly recommend to make this upgrade.
There is a similar design which could be an alternative: https://www.thingiverse.com/thing:3584070. I have not tried it myself, yet. It is a smaller part with a shorter support for the bowden tube and should therefore be a faster print. I also like the zip tie slots. But having just eliminated three of them from my printer, it feels a bit like falling back to use them there again.